1967 Chevy II Wagon Suspension
The car as-purchased had already been lowered quite a lot. Both the front and rear tires tucked nicely into the fenders for a sleek, hot-rod look.
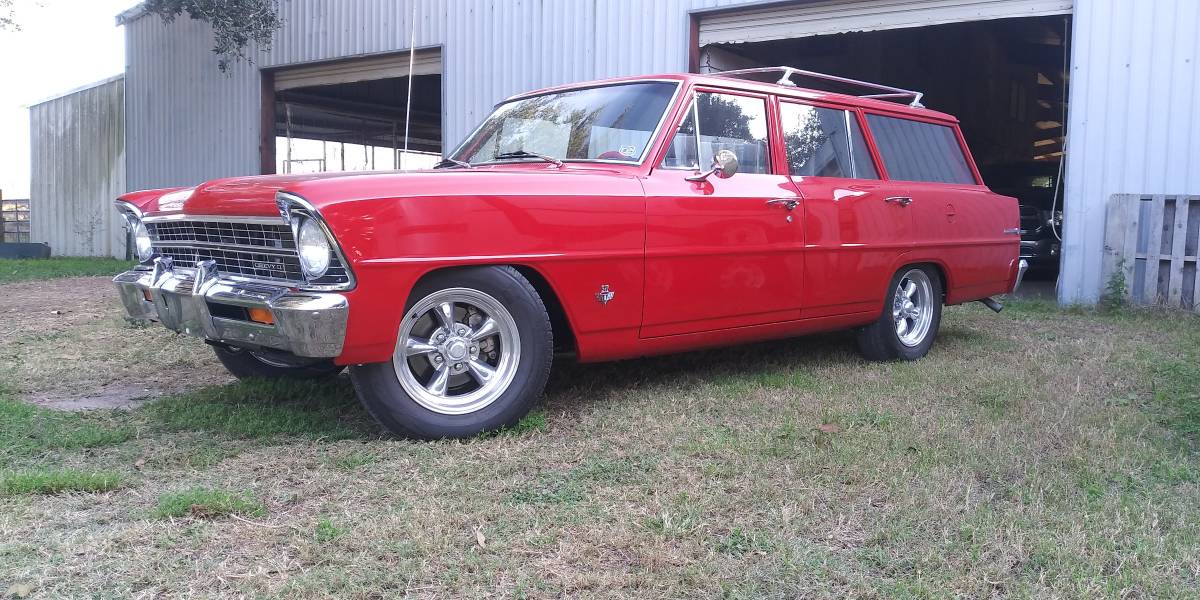
Unfortunately, however, the front left rubbed badly on the fender with as little as 50% right steering input. The front right rubbed a little too, but only near the steering lock or over bumps. Likely this difference was more due to 1967 manufacturing tolerances, but 55 years on the road surely had a little effect as well. Of all the documentation I received for the 2007 restoration, none of it included body panels and there's no other indication of significant collision damage. It's likely all due to incorrect offset wheels and larger circumference tires challenging those tolerances.
The lowering also contributed to a toe-out condition resulting in a very nervous and darty steering feel. The geometry of the Chevy II front suspension is such that wheel compression vs. extension produces an extreme change in toe.
The rubbing was the worst of it, but all four dampers were clearly worn out to varying degrees with an uneven left/right ride height, oil on the shafts and a very soft, bouncy ride. In addition, the front left coil spring was bent. None of them were so bad as the Corvair that gravity alone could move a disconnected damper shaft, but something had to be done.
Solutions
Step 1: Dampers, front springs
I replaced the front dampers and coil springs with a set of Viking coilovers. At the rear, I replaced the air shocks with fixed-height Viking dampers. All four corners are adjustable on rebound and compression. The front dampers have an adjustable spring perch to dial in the ride height. Rear coilovers would require conversion to a Chevelle-style 4-link rear suspension.
Just like installing adjustable dampers on the Corvair the difference in ride quality was immediately felt. I still have all four set somewhere in the middle of the range for rebound and compression, delivering a responsive but not harsh ride. The front coilovers allowed me to raise the front just enough to avoid most of the rubbing. That height also lent a much more neutral toe.


Step 2: Wheels and Tires
Of course, the wheels and tires are an integral part of any car suspension. This site deals with them on their own page. Because wheels are more photogenic or something. Spoiler: The right offset wheels not only cured the fender rubbing, but allowed to run wider tires all around.
Step 3: Rear Springs
I could stick with whatever rear springs I have on the car. I suspect
they're lighter duty coupe/sedan springs to help lower the car or maybe
they're just worn out wagon springs. Hard to say anything other than,
They're low.
It seems I have a choice in the multi-leaf aftermarket between stock ride height and 2" drop springs. Probably I'll end up with stock height to get a little '60s rake. I may be able to add a small rubber/Delrin block in longer U-bolts to lower the rear less than 2". It all depends on what can be done up front. Then I can fine tune with the front adjustable spring perches from there.
Step 4: Professional Alignment
Yeah, I can muddle my way through a garage string alignment, but it's already ballpark close. This is going to require an actual professional and an alignment rack.
Step 5: Front Control Arms
It remains to be seen whether a reasonable alignment can be had at the desired ride height. That may require aftermarket tubular upper control arms for more negative camber and modern style, aftermarket tubular lower control arms to dial in the tow without bringing the tires too close the leader edge of the fenders. TBD.